Posts

How to make the Prestashop 1.7 Classic (default) theme display the thumbnail uploaded for category when displayed as a subcategory.

Edit the sub category template file  /themes/classic/templates/catalog/_partials/subcategories.tpl Edit the following line to make the image url point to the thumbnail image {if !empty($subcategory.image.large.url)} <img class="replace-2x" src="{$subcategory.image. small .url}" alt="{$subcategory.name|escape:'html':'UTF-8'}" loading="lazy" width="141" height="180"/> {/if}
How to make the category images responsive to screen size in Classic (default) theme in Prestashop 1.7

Firstly Edit the theme.css to remove any image size restrictions.  \ themes \ classic \ asset \ css \ theme.css -> find ->  .block-category .category-cover img -> delete/comment width and height values. .block-category .category-cover img { /* width: 141px; */ /* height: 180px; */ } Next edit the category-header.tpl: /themes/classic/templates/catalog/_partials/category-header.tpl Edit the following lines to make the image class img-fluid {if !empty($category.image.large.url)} <div class="category-cover"> <img class="img-fluid" src="{$category.image.bySize.category_default.url}" alt="{if !empty($category.image.legend)}{$category.image.legend}{else}{$category.name}{/if}" loading="lazy"> </div> {/if} Now, clear cache and recompile template files from the performance menu in the prestashop backoffice.

How reinstall Prestashop 1.7 keeping the existing database

Download the latest version of Prestahop 1.7 from the offical versions website > https://prestashop.com/versions/ .  Follow the manual installtion steps:  Download the prestashop package.  Unzip on the local HDD.  On the server, move the files in public_html folder to another folder as a backup.  Upload the prestahop.zip file to the public_html folder.  Unzip the contents here.  Now visit your site, www.example.com.  The installer will start, add basic information.  On the Database setup page, provide the name of the existing database, username and password.  It is important to Untick the "Remove exiting tables".  In the table name prefix field provide a prefix different form the existing one.  Let the installation proceed as normal, it will create a set of empty tables with the new prefix in the database.  In the cPanel File Manager, look for the file 'parameters.php' located in the app/config folder.  Change the...

Problems when generating and uploading JSON from CSV for GSTR1

1. Check whether the GST Offline tool is the latest version. 2. If not, download the latest version from the GST website (gst.gov.in). After you have logged in, click on the downloads tab and go to the offline tools section, download and install the GST offline tool. 3. Ensure the .csv file generated is in the format prescribed in the csv files folder that is available along with the GST Offline tool. 4. Make sure the Date is in the correct format. 5. Make sure the place of supply is in the format "07-Delhi" and not "7-Delhi". The state code has to be 2 digits. If it is a single digit like "7", it must be padded with a zero like "07". There must be no spaces in between. 6. Make sure the GSTIN is in the correct format. 77AAAAA8888A1ZX. Let's break down the GSTIN: 77 - 2 Digit State Code AAAAA8888A - PAN 5letters,4digits,1letter 1 - GST related digit Z - compulsary Z X - Checksum digit These are some basic checks that are applicable ...

BBMP Property Tax PayU Repay Time Out

Encountered an error while trying to pay BBMP Property Tax online ? You are already on your bank's website, but due to some error, you could not complete the payment. Do not worry. The BBMP property tax website allows for repayment of property tax online, in case the payment failed the first time around. But, then again the PayU payment gateway does not load as expected and times out.   To get around this problem you will have to : navigate to the Payment Status Link on the BBMP website. ( https://bbmptax.karnataka.gov.in/Forms/continuepayment.aspx ) Here, enter your old Application No. and click Retrieve.  You will see a list of property tax challans and receipts generated by you. You will find that the failed payment shows "Paid Amount" - 0.00 and a "Repay" link next at the end of the row. When you click on the repay link, ideally, you should be taken to the PayU payment gateway page, but the page times out. Here is the trick, clear all your coo...

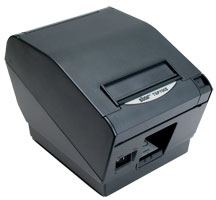
How to install a network Star TSP700II installed on Windows XP in Windows 10

Image
Goal : You need to add a Star Micronics network printer installed on a XP machine to a Windows 10 machine.   Issue : Windows update cannot find a suitable driver for the Star printer when you add the printer over the network. Solution : Step 1: Download the Star Micronics printer software from here .. http://www.starmicronics.com/support/download.aspx?type=1&tabText=StarPRNT%20V3.4%20FULL%2032/64-bit&path=DriverFolder\drvr\starprnt_v340.zip&id=1743&referrer=http://www.starmicronics.com/support/ Step 2 : Navigate to the Windows folder in the download. Look for the 64 bit windows installer. Step 3 : Install the software. Step 4 : Make sure the printer is already installed on the Windows XP machine and that it is switched and reachable. If not installed, use the same Star Micronics printer software that was downloaded earlier, to install the printer on the XP PC. Make sure the printer is switched on and connected when the software is installed. ...

Ubuntu Grub not loading at boot on your HP Pavilion X360

Finished installing Ubuntu on your HP Pavilion X360, but can't see the Grub boot loader at startup. It could probably be cause the BIOS is not loading the right boot loader.  You can follow these steps to solve your problem. Step 1 : Reboot the PC and press ESC at boot to bring up the options menu. Step 2 : Press F10 to go to the BIOS. Step 3 : Once in the BIOS go to the System Configuration tab. Step 4 : Press Enter on the Boot Options menu item to select it. Step 5 : Under UEFI Boot Order, press enter on OS Boot manager to select it. Step 6 : Press F5/F6 until the Ubuntu boot loader is the first item on the list. Step 7 : Press F10. Step 8 : Press F10 again to save and exit.   You are done. The Ubuntu boot loader should load when you restart the PC.